ESIDE Tutorial
- Turn on ESIDE
- Lack of Input Validation Marker
- Lack of Output Encoding Marker
- SQL Injection Marker
- Access Control Marker
- Explanation and Example page
- Ignore Marker Option
- Refresh ESIDE option
Turn On ESIDE:
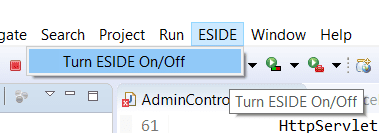
1.To turn on ESIDE click on the ‘ESIDE’ button on top. Then click on ‘Turn ESIDE on/off’ option.
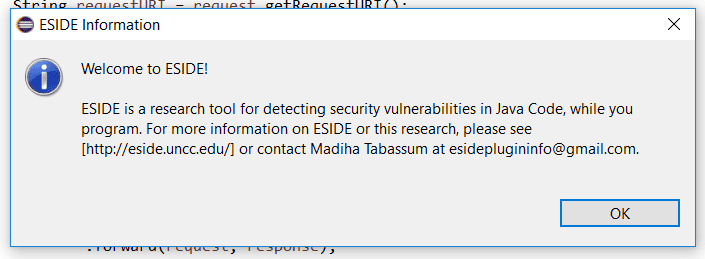
2. If you are turning on ESIDE for the first time you should see this pop-up. Read it and click ok.
3. After that, you should see the following pop-up. Click OK.

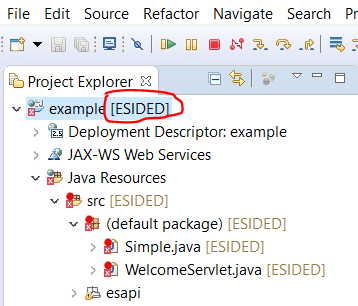
4. Right now ESIDE is scanning all the projects in the workspace to detect security vulnerabilities in those projects. Please wait until the scanning is done. After a while, you should see the projects are marked ‘[ESIDED]’. If you expand the project you should see some java files are marked with . This means that the file contains some code that is vulnerable to some sort of attacks like XSS and SQL Injection.
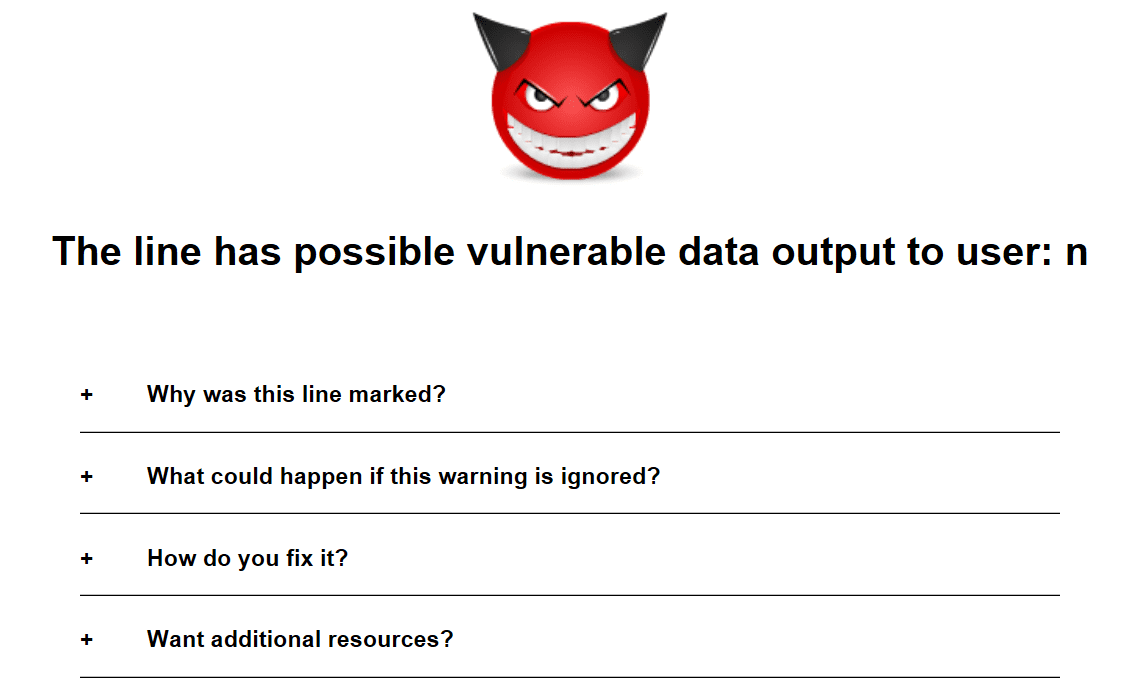
5. If you go to any of the files you should see some lines are marked with a red devil icon. This means that line is vulnerable to some sort of attack. Currently, ESIDE shows three types of marker: Lack of input validation and Output encoding marker that can lead to XSS and SQL Injection attacks.
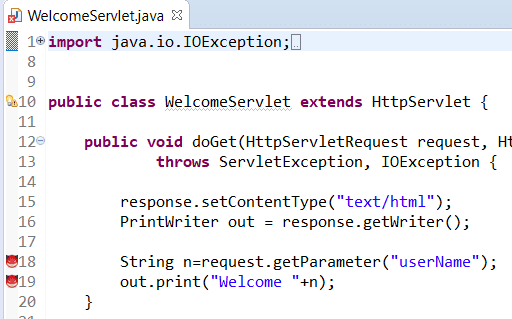
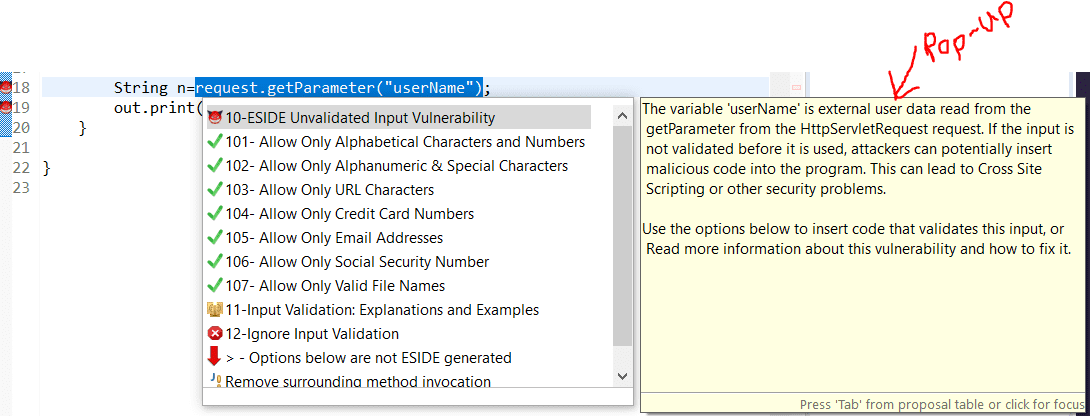
6. If you click on the marker(the devil icon), you should see a list of options and you can read about each option in the pop up on the right by clicking on that option. The first option states why the line is marked and the type of vulnerability the line has.
7. ESIDE Markers are not JAVA Errors. You can still run your project even if it contains ESIDE markers.
Lack of Input validation Marker:
1. ESIDE marked a line with Input validation marker if it takes input from users or reading data from the database without validating the input/data. Because the input can contain scripts that can lead to cross-site scripting attack. To prevent this attack the input/data need to be validated. ESIDE gives you some quick fix options(options with ) to validate the input. You can read about each quick fix option in the pop-up on the right.
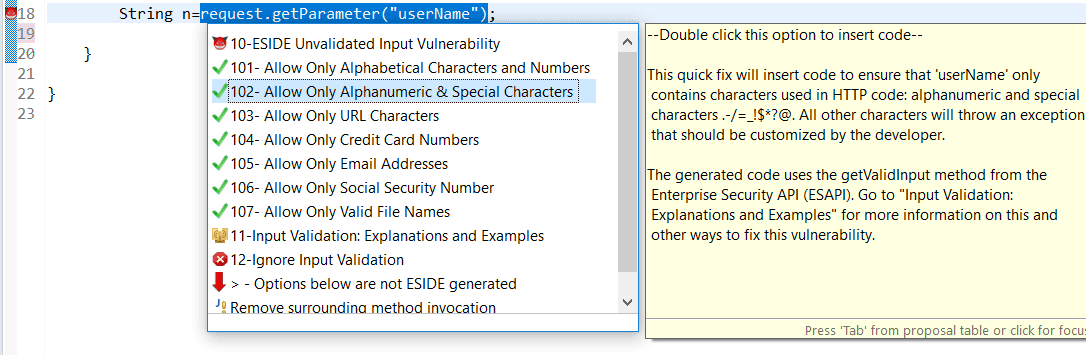
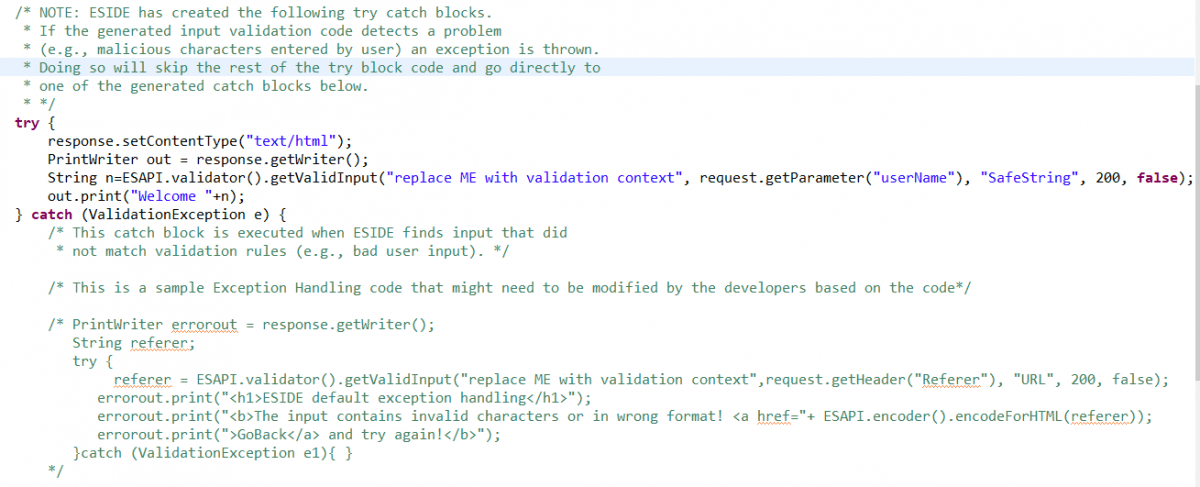
2. You can select the appropriate quick fix option and double click on the option. ESIDE will automatically insert the validation code and the marker for that line will go away.
Lack of Output Encoding Marker:
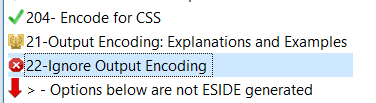
1. ESIDE marks a line with this marker if the line print any variable to the JSP page without encoding it. The variable can contain executable script thus can lead to cross-site scripting(XSS) attack. To prevent XSS the variable need to be encoded. ESIDE give some quick fix options(options with ) to encode the variable. You can read about each option in the pop-up on the right.

2. You can select the appropriate quick fix option and double click on the option. ESIDE will automatically insert the encoding routine and the marker for that line will go away.

SQL Injection marker:
1. ESIDE marks a line with this marker if it uses dynamic statement instead of the prepared statement to access the database.

2. For this marker, ESIDE does not provide any quick-fix but you can go to the ‘Explanation and Example page’. In the ‘How to fix it’ section you can learn how to write the prepared statement.
Access Control Marker:
1. What is Access control vulnerability:
An access control vulnerability exists when a real, authorized user has access to data or functions that they should not have access to. For example, if a regular forum user was able to see or modify another user’s private profile information, that would be an access control vulnerability. There should be an access control check to ensure that only the authorized person can access that function.
2. When ESIDE shows Access Control Markers:
ESIDE shows Access control markers when it detects that your code contains a call to a function that accesses secure information. This does not necessarily mean that this code is vulnerable; ESIDE is just asking you to identify where the access control check takes place.
3. Example:
ESIDE marked following line with access control marker because this line is calling a function to see all the orders that were placed in a bookstore. Only employee of the bookstore should be authorized to call this function.

Thus, ESIDE expects an access control check for this line. An access control check for this line should be as follows, that this function can be called only if the user is an employee.

ESIDE expects you to highlight the access control check for the sensitive function as shown in the following snippet, to make sure that an access control check has been placed before accessing the sensitive function!

You can do this by clicking on the yellow question mark, then double-clicking on the ‘Add annotation’ option, and highlight the relevant check. Please look at the following video to see how to highlight access control check:
Explanation and Example page:
1. You can read about each vulnerability in detail in the explanation and example page. Double click on the ‘explanation and example’ option and a webpage will open-up inside eclipse.

Ignore Marker option:
1. You can ignore a marker using this option if you think the line is not vulnerable though ESIDE is marking that line. Double click on ‘Ignore’ option and the marker will go away.
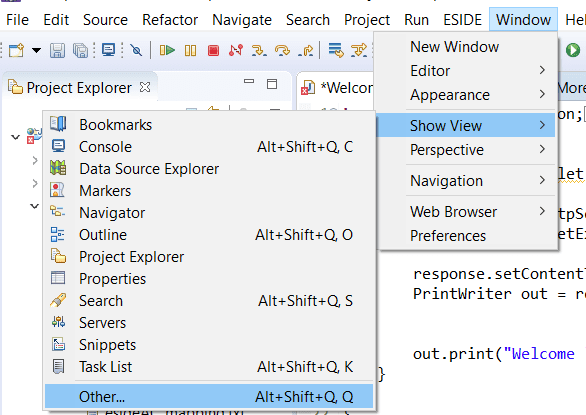
2. You can track all the markers you ignored in the ‘Ignore Marker’ view. To open the ignore marker view: click on windows-> show view->others.
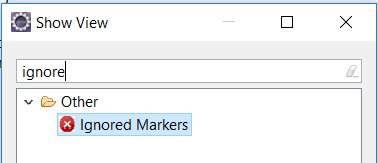
3. Write ignore in the search box. Double click on ‘Ignored Markers’.
4. The ignored marker view will be open at the bottom. You should see all the markers you in the view.

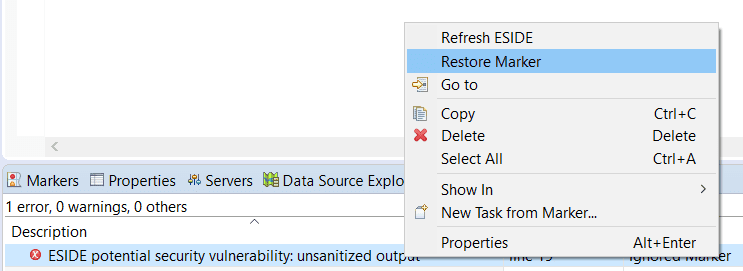
5. To restore a marker, double-click on that marker in the view to open the location of the marker in the editor. Then select the marker-> right click-> Click restore marker. The marker will be restored.
Refresh ESIDE option:
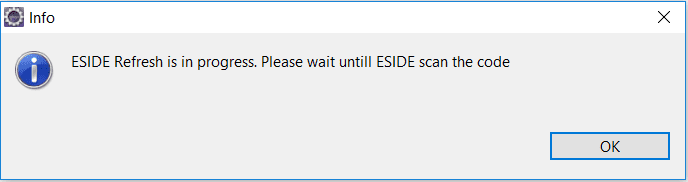
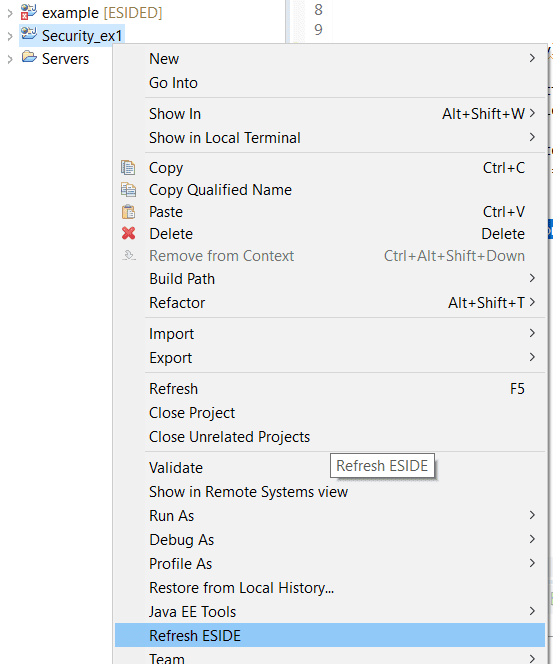
1. If you import a new project in eclipse while ESIDE is turned on, you will see the project is not synchronized with ESIDE and it is not marked as [ESIDED]. To synchronize it, select the project-> right click-> click Refresh ESIDE.
2. You should see the following pop-up. Click OK. Wait for ESIDE to scan the project. After scanning is complete, you will see the newly imported project marked as [ESIDED].